May 19, 2026 • Callum Draper • 9 min reading time • Prices verified June 6, 2026
Building Your First Kegging Setup: Corny Kegs, Ball Lock Hardware, and Honest Parts-List Costs
If you’ve bottled more than a few batches of homebrew, you already know the ritual: sanitizing fifty-plus individual bottles, filling each one, capping, conditioning for two weeks, then cracking the first one only to find it’s either flat or gushing. A keg system replaces all of that with a single stainless container — called a Cornelius keg (or “corny keg”), a repurposed soda-industry vessel that holds five gallons — and a small tank of CO₂ (carbon dioxide, an inert gas) that both carbonates your beer and pushes it to your glass. The switch sounds simple, but the first time you’re staring at a parts list of disconnects, regulators, gas lines, and liquid lines, it stops feeling simple fast. This guide breaks down every component you actually need, what things cost in 2026, and — critically — where the cheap versions bite you later so you can decide which corners are worth cutting.
The Core System: Five Parts You Cannot Skip
Think of a kegging setup as a closed loop. CO₂ flows from a cylinder → through a regulator (which drops the high-pressure tank gas down to a controllable serving pressure) → into the keg through a gas disconnect → pushes beer out through a liquid disconnect → up a beverage line → out a tap into your glass. Every link in that chain matters.
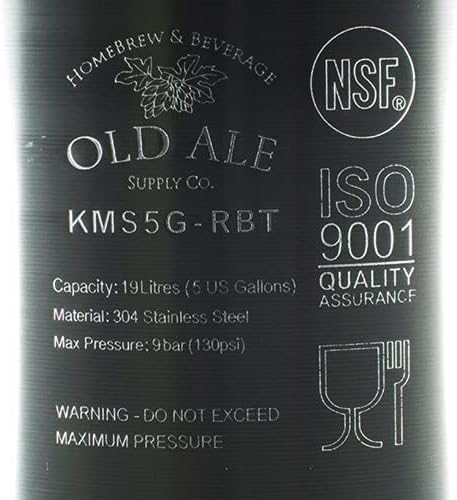
1. The Cornelius Keg
Corny kegs come in two connector standards: ball lock and pin lock. Ball lock is now the dominant format — wider availability of replacement parts, more online documentation, and the standard that essentially every retailer stocks. Per the Craft Beer and Brewing kegging equipment overview, ball lock kegs became the default homebrewing standard after the Pepsi/Coke surplus market dried up, because the aftermarket hardware ecosystem is simply deeper.
New vs. used: Used corny kegs sourced from reputable homebrew retailers (not random auction sites) typically run $40–$65 per keg in 2026. New stainless kegs from brands like Torpedo Kegs or Kegland’s Cornelius line run $90–$130. The Homebrewers Association kegging overview recommends inspecting used kegs for dented posts, worn O-rings, and lid seal damage — all fixable, but factor a $5–$10 O-ring refresh kit into the used price.
For most people building their first setup, one or two used kegs with fresh O-rings is the right call. The stainless is essentially indestructible if it hasn’t been physically abused.
2. The CO₂ Cylinder
Standard sizes for homebrewing are 5 lb and 10 lb cylinders. A 5 lb tank will push and carbonate roughly six to ten five-gallon kegs before needing a refill, depending on how much you purge lines and headspace. A 10 lb tank roughly doubles that range.
What you actually pay: tank purchase is $80–$150 for a new cylinder, or $30–$60 for a used tank swap at a local welding supply or gas shop. John Palmer’s How to Brew notes that many brewers save money by buying a larger tank upfront because the cost per refill drops while the fill price stays nearly flat regardless of tank size — so the 10 lb tank ($20–$30 to refill in most markets) becomes more economical past your first year.
Important: CO₂ cylinders must be hydro-tested (pressure-tested for safety) every five years. Reputable retailers will flag expired cylinders; check the stamp on the collar before buying used.
3. The Regulator
The regulator is the single component where budget options cost you later. A dual-gauge regulator — one gauge reads tank pressure (so you know when it’s running low), one reads output/serving pressure — is the minimum useful configuration. A dual-body regulator (two independent outputs, each adjustable) is useful if you’re serving two kegs at different carbonation levels.
Owners across aggregated forum reviews consistently flag a pattern: no-name regulators under $40 leak at the bonnet nut, lose calibration after a few temperature cycles, and have diaphragm failures within 18 months. Reviewers at Craft Beer and Brewing specifically call out Taprite and Kegland as the two brands with the most documented long-run reliability in the homebrewing segment. Taprite dual-gauge regulators run $70–$95 new; Kegland’s Duotight-compatible regulators run $85–$110. That $30–$40 premium over generic buys you a regulator that will outlast multiple keezer builds.
4. Disconnects, Lines, and Hardware
Ball lock disconnects come in two flavors: gas-in (gray, marked “IN” or with a single dot) and liquid-out (black, marked “OUT” or with two dots). They’re not interchangeable — the ball lock geometry is slightly different on purpose. Buy at least one spare of each; they’re $4–$8 apiece and losing one mid-session is painful.
Beverage line diameter matters for pour quality. The BYO force carbonation guide explains the physics: longer, narrower line creates more resistance, which slows the pour and reduces foaming. A standard homebrew setup at 10–12 PSI serving pressure typically uses 3/16-inch inner diameter beverage line at 5–8 feet in length. Going shorter creates foam; going larger bore also creates foam. This is one of those “read the spec sheet, then trust it” scenarios — the math is settled.
Gas line is less sensitive to length; 1/4-inch ID vinyl tubing at 2–4 feet between regulator and keg is standard.
Clamps: use worm-gear hose clamps (the ones with a screwdriver slot) rather than spring clamps on beverage connections. Spring clamps are harder to tighten to consistent torque and show up in owner reports as a common slow-leak source.
5. The Tap and Faucet
Your two real options for a first build:
- A picnic tap (a hand-held plastic tap that clips directly onto the liquid disconnect): $8–$15, zero installation, totally functional. Many brewers use these for years.
- A shank-and-faucet setup through a dedicated keezer (a chest freezer converted to a beer dispenser with a collar and taps): $30–$80 per tap, requires drilling and a temperature controller.
The Homebrewers Association kegging overview frames this well: the picnic tap is the right first-build choice unless you already have a chest freezer earmarked for conversion. Adding the keezer infrastructure later is straightforward; building it into the first purchase before you’ve confirmed you like kegging is unnecessary risk.
Honest Parts-List Cost: Three Build Tiers
By the numbers — 2026 retail pricing, single-tap, one-keg starting point:
| Build Tier | Keg | Tank + Fill | Regulator | Hardware + Lines + Tap | Total |
|---|---|---|---|---|---|
| Starter (used keg, picnic tap) | $55 | $90 | $75 (Taprite) | $35 | ~$255 |
| Mid (new keg, picnic tap) | $110 | $110 (10 lb) | $85 (Kegland) | $45 | ~$350 |
| Keezer-ready (new keg, shank + faucet) | $110 | $110 | $95 | $120 | ~$435 |
These figures exclude the chest freezer ($150–$300 used) and temperature controller ($40–$80) for the keezer build, which is its own article. The point: a functional, genuinely good single-keg setup lands between $250 and $360 depending on your used-hardware tolerance. You are not saving money versus bottling on batch one; you are saving labor and gaining quality and consistency from batch two onward.
Force Carbonation vs. Natural Carbonation in the Keg
You have two options for actually getting CO₂ into solution in the keg.
Set-and-forget: Connect gas at serving pressure (typically 10–14 PSI at 38°F), wait 7–14 days, serve. Per the BYO force carbonation guide, this produces the most consistent carbonation because equilibrium is reached gradually. The tradeoff is patience.
Burst carbonation: Connect gas at 30–40 PSI for 24–48 hours, then drop back to serving pressure. Faster, but owners report a higher incidence of overcarbonation and foam if the pressure isn’t dropped in time or the keg isn’t cold enough when you start.
Shake carbonation: Apply high pressure and rock the keg to force CO₂ absorption. Works in 20–30 minutes, but the carbonation is uneven and reviewers across multiple homebrew publications consistently rate it as the method most likely to produce gushers. Useful in a pinch; not a repeatable process.
The cold-and-patient method wins on consistency every time. The BYO guide recommends targeting 2.3–2.5 volumes of CO₂ for most American and British styles, which corresponds to roughly 11–13 PSI at 38°F — a range your Taprite or Kegland regulator can hold without drama.
The Tradeoffs Nobody Spells Out
Used kegs are great — except when they aren’t. The O-ring refresh is non-negotiable on any used keg. Poppet valves (the spring-loaded valves inside each post) occasionally stick or leak; a full poppet + O-ring kit is $8–$12 and eliminates 90% of keg-related headaches. Craft Beer and Brewing’s equipment guide specifically recommends pressure-testing any used keg with CO₂ before transferring beer into it — fill it, seal it, bring it to 20 PSI, spray every post and the lid seal with Star San solution, and watch for bubbles.
Regulator placement matters. If your CO₂ tank is inside a keezer or cold space, the regulator should be outside in ambient temperature. Cold regulators lose calibration accuracy. This is a spec-sheet fact from every major regulator manufacturer, and owners consistently note it as the first troubleshooting step when pressure readings seem unstable.
Line length is not just foam management — it’s safety. Serving line that’s too short for your pressure means beer moves too fast, which means you’re constantly venting CO₂ to drop serving pressure, which means more frequent tank refills and more oxidation risk if you ever pull the gas line by accident. Get the 5–8 foot run of 3/16” line right on the first build and you won’t touch it again.
The Decision Rule
If you brew more than four batches a year and are tired of bottle conditioning, a kegging setup pays back in labor and consistency within the first six months. The $255–$360 starter build is the right entry point.
If X, then Y:
- If you want lowest entry cost and maximum flexibility: Used keg + Taprite regulator + picnic tap. ~$255. Upgrade to keezer later when you’re sure you’re staying in the hobby.
- If you’re committed to a dedicated serving setup: Budget $435–$550 all-in including the chest freezer and temperature controller from day one. Doing it twice costs more than doing it right once.
- If you’re already running two-plus kegs: A dual-body regulator ($120–$160) is worth the upgrade over two separate single regulators immediately — cleaner gas manifold, fewer connection points, fewer leak opportunities.
- If your local homebrew shop stocks Kegland’s Duotight push-to-connect fittings: Seriously consider going that route for all gas connections. The consensus from owners who’ve switched is that push-to-connect fittings eliminate the barb-and-clamp leak troubleshooting cycle entirely, especially for brewers who break down and rebuild their setup between batches.
The first keg of beer you pour without touching a bottle brush is the moment this hobby gets measurably more enjoyable. The hardware is not complicated — it just looks complicated on a parts list. Buy the regulator you’ll keep, refresh the O-rings on any used keg, get the line length right, and the rest follows.